
Once the ShapeArray™ has been completely lowered and is resting on the bottom of borehole, the tripod and block and tackle system can be used to provide mechanical assist for the lifting and dropping required to settle the instrument into the casing and check compression.
NOTE: This is one step in installing a Crated ShapeArray with a Weight Assembly. For a listing of the overall process, and the tools and equipment that will be required, please refer to Installing SAAV with a Crate and Winch System and Weight Assembly. Please ensure the steps are followed in order and that any steps prior to this one are completed before starting this step.
Step 1 – Setup the Tripod and Attach the Block and Tackle
Assemble the tripod by attaching the legs and move it into position centered over the borehole casing. The block and tackle assembly has quick links on each end that are used to fasten it to the ShapeArray™ and to the tripod via 1/8” aircraft cable.
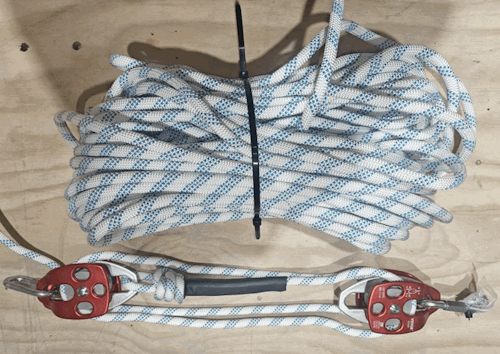
Figure 1 – Locate the Measurand Supplied Block and tackle with a quick link.
Attach the block and tackle with the quick link to the eyebolt on the tripod.
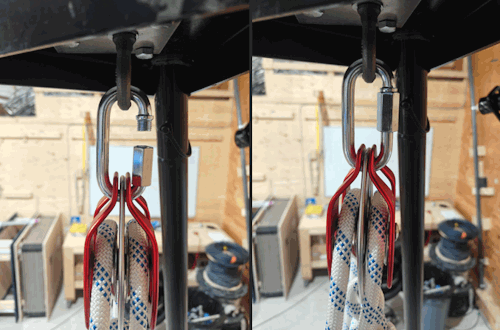 Figure 2 – Attach the quick link to the eyebolt.
Once attached to the tripod, the zip ties securing the block tackle’s rope can be removed.
WARNING: Be careful when clipping the zip ties to ensure that no damage is done to the rope.
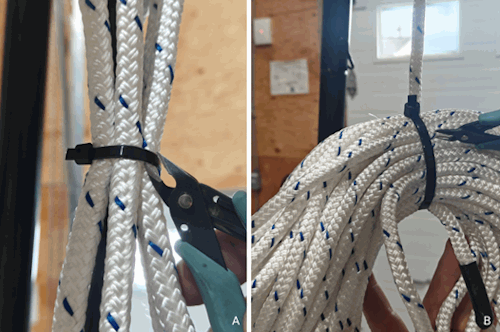
Figure 3 – Clip off the zip ties securing the rope in the middle of the block and tackle (A) and the slack rope (B).
Once attached and the rope freed, the block and tackle on the tripod should be free to lift by pulling on the slack rope. Before continuing, arrange the block and tackle’s pull range to allow for an appropriate range of motion. At least a 2 m (6.5 feet) pull range is desired.
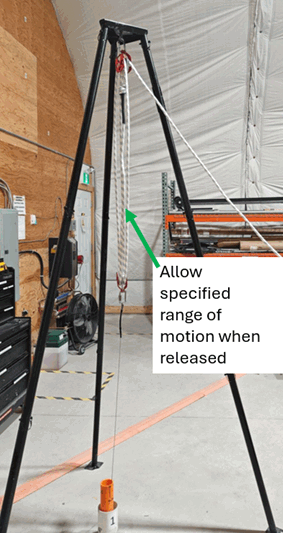
Figure 4 - Allow adequate range of motion for pumping.
Step 2 - Attach the ShapeArray™ to the Block and Tackle
Roll the reel forward (turn counterclockwise on the winch) to produce slack in the aircraft cable connected to the ShapeArray’s Weight Assembly. Disconnect the aircraft cable connecting the ShapeArray™ to the reel by removing the 7/16” nut and washers holding it in place.
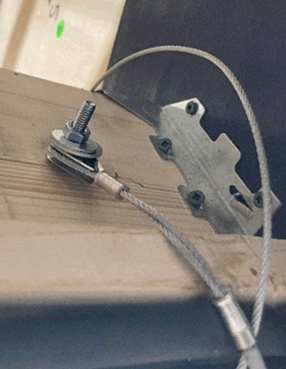
Figure 5 – Remove 7/16” nut and washers connecting the Shapearray’s aircraft cable to the reel.
Once disconnected from the reel, cut the loop on the end of aircraft off so it can be threaded into the wire rope and thimble kit included. Tape should be used to cover the sharp ends of the cut cable.
WARNING: When cutting steel cable there should be no tension in the cable. Ensure the cable is slack prior to cutting with cable shears while wearing appropriate eye and abrasion protection. The ends of the cut cable will be sharp.
On the ShapeArray’s remaining aircraft cable, measure out enough slack to allow the ShapeArray™ to be attached to the block and tackle. Ensure there is enough slack in the aircraft cable so that it extends above the fiberglass extension rods and form a loop at the end using 1/8” Wire Rope Clip and Thimble Set provided.
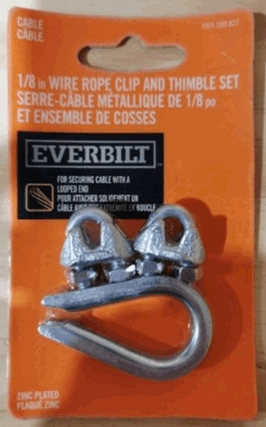
Figure 6 – Locate the included Wire rope clip and thimble set
Pull the aircraft cable over the wire rope clip to form the loop. Ensure that loop is positioned such that the aircraft cable will be taut when attached to the bottom of the block and tackle. Using a 5/16” wrench, secure the two clips to the cable as shown in figure below.
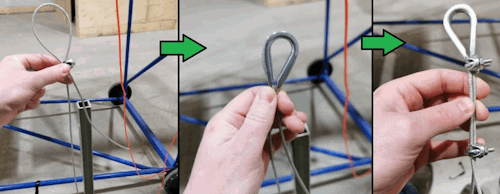
Figure 7 – Use the Wire rope clip and thimble set to shorten the aircraft cable
Attach the newly made loop in the aircraft cable to the block and tackle with a quick link at the bottom. The ShapeArray™ and Weight Assembly can now be lifted by pulling on the slack rope of the block and tackle. Lifting the array in this manner and dropping it by releasing the block and tackle’s slack rope will be used to settle and compress the ShapeArray™ in the next step.
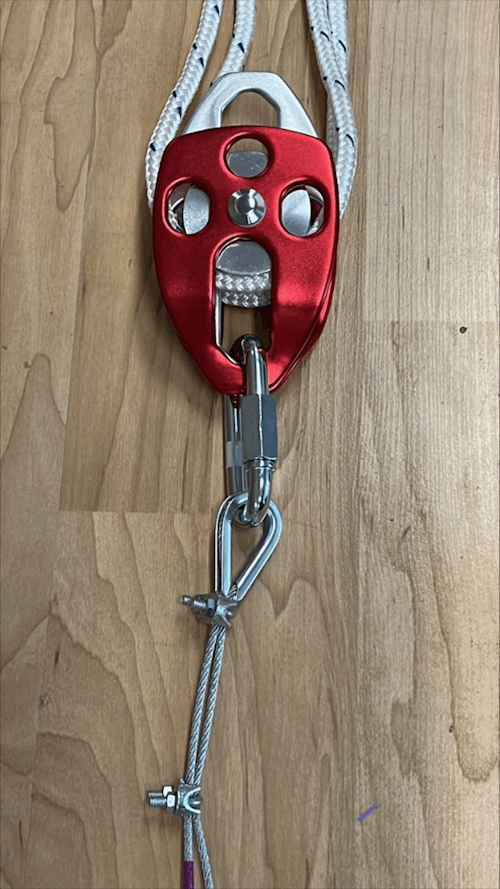
Figure 8 – Attach the aircraft cable to the quick link at the bottom of the block and tackle.